I’d like to thank Planet7 for his help with Horizons and Epcot photos that have really helped fill in the gaps in my model. He runs a really cool site on the Universe of Energy attraction: http://planet7.home.mindspring.com/energy/ check it out for some really cool info on UoE!

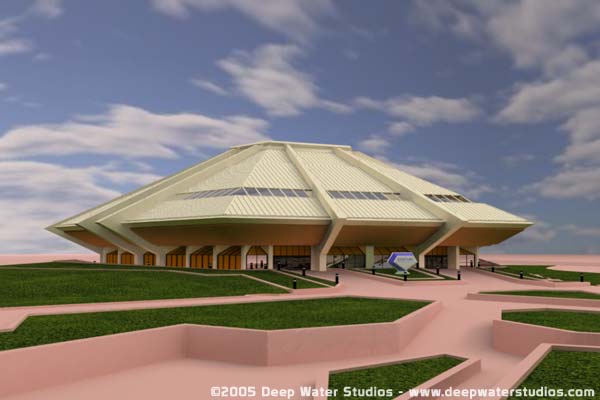
High Quality Rendering
The image above is a final quality rendering of the pavilion’s progress. I know it doesn’t look like much, but there have been a lot of internal changes to the file. Let me explain what’s been going on the last few month, and as to why it looks like nothing has been going on around here. 🙂
Now for the last two years I’ve been learning the 3D software Maya, at work. So my modeling and rendering skills have been keeping up with the industry, it was just my software that has been left behind. It’s that darn upgrade price that get’s ya. It’s pretty tough to justify $1000 for an upgrade when you do this as a hobby. And because of this, I had been running with an old version of 3D Max for years, the upgrade costs kept me with this old version. The software was hopelessly out of date. It still functioned, but it couldn’t produce nice, realistic renderings and it’s polygonal modeling tools were weak at best. Yet, I kept on because this was the best I had. And besides, I had been deep into Maya now (close to 40 hours a week developing a realistic human model for work) and I had begin to feel more comfortable in Maya than Max.
It’s not uncommon for these 3D programs to *start* at $2000. Needless to say, that kind of price is out of the range of most hobbists.
A few months ago Softimage ran a special promotion offering their XSI 4.0 software at an-unheard of price of $500. Now, at first, $500 sounds like a lot of money, but in the world of 3D programs, this is mere pocket change, especially when talking about a full, new version of the software. So when Softimage ran their promotion I was lucky enough to have just finished a free-lancing gig and had the cash to pick up a copy. Talk about at the right place at the right time. 🙂 As part of their promotion, they were also offering $200 worth of training DVDs free with XSI, so I got those too.
Sure there are 3D programs out there that cost much less, but their cost shows in their, tools, their capabilities and their renderings. Trust me I’ve probably tried them at one stage or another through the years. XSI it a rock solid professional level 3D program complete with a professional level render engine. I would have been a fool to pass this up, even if I had never used XSI in my life. 🙂
So what have I been doing the last couple of months? Learning XSI that’s what. 🙂 I’ve also been converting the Horizons model over, setting up the shaders, and render environment. All of this takes time, lots of it and especially when you’re holding down a full time job and have a family. Many, many nights I worked my normal job and then came home to work until 1 AM.
But most of that is behind me now, as I’ve finished up most of the conversion process and can concentrate on creating new parts of the model.

The Old Mesh
This is pretty much what the mesh looked like when I brought it into XSI. Pretty messy huh? The mesh was trangulated during the export/import process and there were some edge/polygon errors introduced into the process. These errors would come back to bite me later.

Rendering 05.23.05
Here I’ve started establishing the new XSI shaders. They’re still in the rough stage at this point but that’s cool. I’m still learning how XSI operates.

Rendering 05.27.05
My first attempt at using Global illumination and Final Gathering in XSI. Not very good results. Yuck. But the scene is set, over the next month and a half I’d be tweaking the settings and scene to get the render closer to real. It took a lot of time and I had to put the project down from time to time to deal with real world issues. 🙂
Rendering 06.1.05
Continuing to tweak the scene.

Rendering 06.11.05
More tweaks

Rendering 06.23.05
Here I have it just about where I want it. It’s close enough for now and I can concentrate on modeling again, knowing that the model will look pretty good with these settings and I can tweak it later if needed. So for the last week or two I have been working on the structure of the model itself.

The New Mesh
Remember when I mentioned those polygon errors? Well, they came back to bite me on July 2nd. I decided that I was going to clean up the mesh to make it a bit easier to see what I was doing and to optimize the renders a bit. Boy, was I in for a rude awaking.
It seems that during the conversion process the roof meshe had developed two sides. So every pologon who had only one side now had two. And this wrecked havoc with the roof mesh. I first noticed the problem when I went to delete the extra edges creating the triangular polys on the roof. I’d select them and delete them only to delete the whole poly. This didn’t happen when I cleaned up the roof supports. Something was very wrong.
After fiddling with it for a few hours I realized
that the only easy was out was to rebuild the roof from scratch. It would have taken too long to try to find, and select each double poly, delete it and sew back the remaining vertices. Rebuilding was the only way that made sense. 🙁
So I spent most of the July 4th weekend rebuilding the roof. But now it’s done and I can concentrate on the rest of the model. I don’t think I’ll be having any more problems like I did with the roof on the rest of the model. The reason I think I’m safe is that I used a different workflow to create the roof and bring it into the model. So I should be able to continue to safely clean up the rest of the model without any more major problems…let’s hope. 🙂
Well that does it for this update, thanks for stopping by and taking a look. 🙂